
Piping is a strip of fabric or leather that trims the edges of a seam between two pieces. It makes for a thin band that comes out of the said seam and brings extra definition to your seam.
GENERALITIES
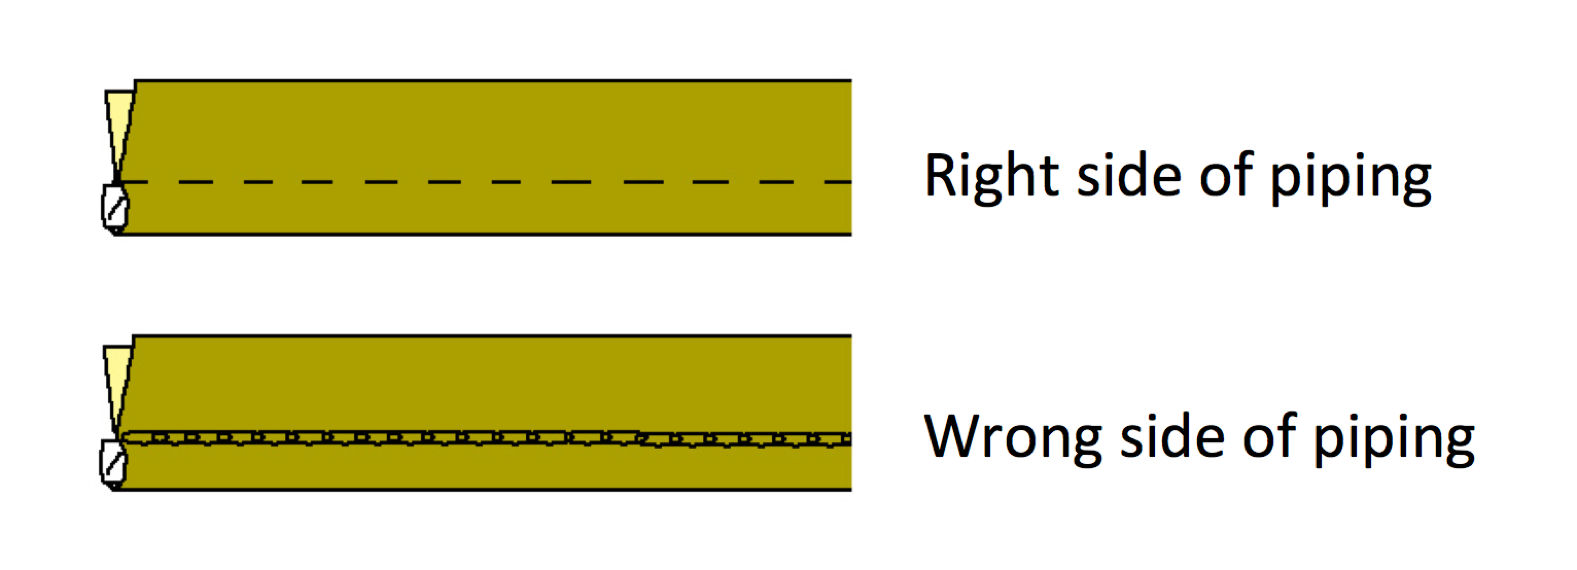
Piping of solid color can be found in every haberdashery. Store-bought piping has a right side and wrong side. You can distinguish between the sides thanks to the stitch line that keeps the cording inside the fabric: the stitch line on the right side is much more visible than it is on the wrong side.
In most cases, thin cording is sewn inside the strip of fabric which contributes to make the seam stand up. It can also be a folded strip of fabric, with no cording inside.
MAKING PIPING
It is easy to make piping from any bias tape. You can then play with types of fabric, colors, patterns...
To make piping:
- Cut 3cm-wide strips of fabric in the bias. The length of bias tape will depend on the length of the seam.
- Fold the bias in half lengthwise then insert thin cording inside, against the fold (diameter is usually 2mm). Pin in place.
- On the right side, stitch along the cording, using a zipper foot.
To get a better finish, you will always use the zipper foot when applying piping.
APPLYING PIPING
Sewing piping between two pieces of fabric means:
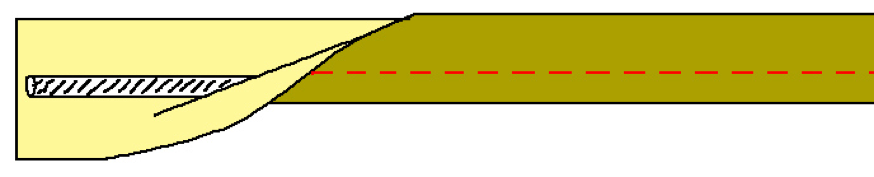
With right sides together, place the piping along one edge of one piece, with the corded part being at 1cm from the edge.
Stitch as close to the cording as possible and on top of the piping seam line.
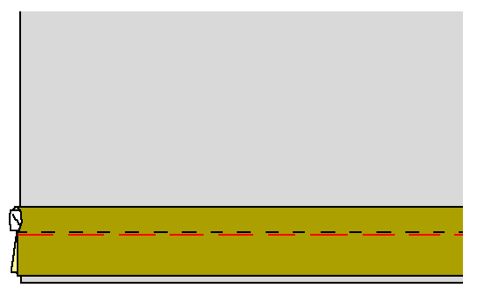
With right sides together, place the fabric piece with no piping over the other piece, edges matching. Stitch at 1cm from the edge, exactly on top of the seam line and still as close to the cording as possible.
Turn your work on the right side and press.
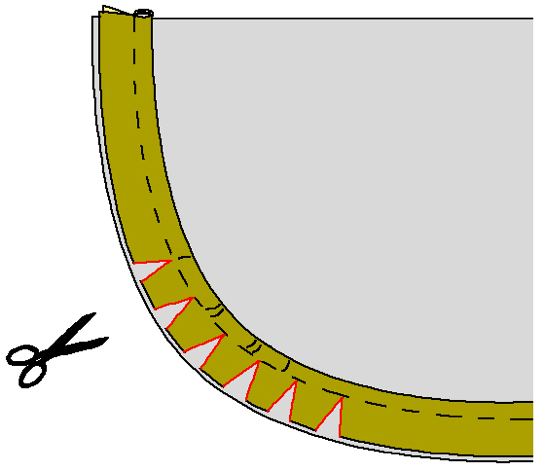
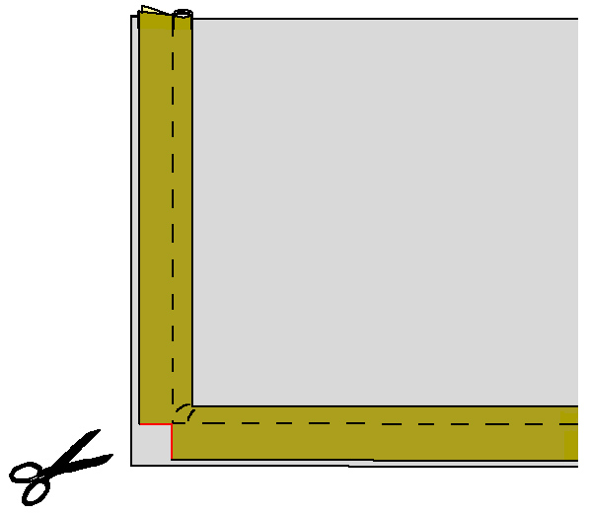
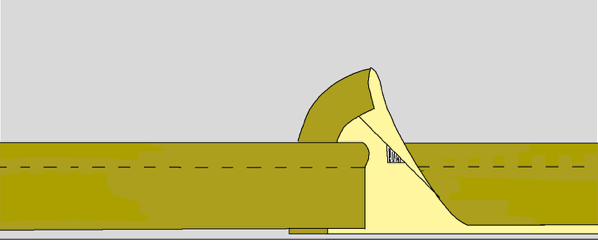
APPLYING PIPING ON CURVES OR ANGLES
When sewing piping onto a curve, you will proceed as instructed above, but you will also have to snip the seam allowances of the piping just after having sewn it onto the first piece of fabric and before placing the second piece of fabric on top.
When applying piping on an angle, clipping the former before sewing it onto the first piece of fabric will help in positioning it.
Piping will be more flexible on the curve or angle once clipped/snipped and will fit the shape of the edge better.
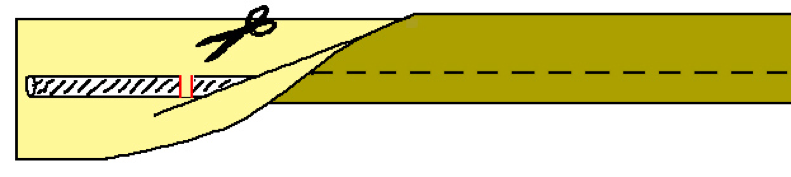
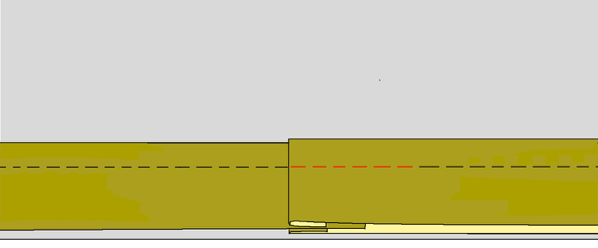
CONNECTING PIPING ENDS
When sewing piping continuously around an edge, you will have to join both ends of the piping.
You will have to:
- Unpick 3cm from one end of the piping and trim the cording inside,
- Fold the end 1cm on the inside,
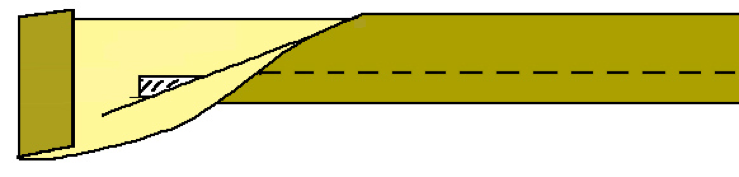
- Place and stitch the piping along the edge of the first piece as instructed above, starting and finishing at about 2cm from both ends,
|
- Insert the corded piping into the the folded bias tape, |
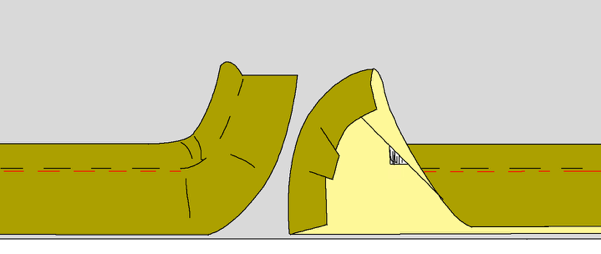
|
- And stitch the connection at 1cm from the edge to finish your seam.